How To Set Up Your LinkedIn Profile As A Writer
Does your LinkedIn profile read like an old-fashioned paper resume or cv?
Or is your writer's profile even on LinkedIn?
Years ago, LinkedIn was basically an online filing drawer full of people's boring lists of work experience and jobs they had held.
These days it is one of the best places to find work as a freelance writer. And the profiles that are effective in helping people find work look nothing like what they used to. This is what long-time writer Lynnaire Johnston has to say about it.
"I've been a professional writer in one form or another all my adult life, and LinkedIn gives me the opportunity to showcase my skills in myriad ways, while reaching potential customers. It truly is the platform of opportunity for writers."
With over billion users across 200 countries and territories worldwide, LinkedIn offers a unique opportunity to discover potential clients that need your help.
This is the first in a series on how to use LinkedIn to help you build your writing profile and find new clients.
In this article you'll learn the number 1 key thing you need to do to make it easy for potential clients to find you on LinkedIn. And not just find you. If you set up your profile right, searchers will believe you can help them. Which makes them much more likely to ask you to work with them.
And there are extra benefits to be had.
Your LinkedIn profile is a perfect place to show off your professional writing portfolio AND the professional side of you. Plus the search and relationship building functionality are fantastic for finding your ready-made customer base.
Just remember that you'll want to put your best foot forward in presenting what you do and how you help people. This is no place for posts about what you ate for breakfast...unless food IS what you write about.
Setting Up Your Writer's Profile
It will be no surprise that images and text are the tools you'll be working with to make your profile pop. The secret is in knowing what to put where and how to accentuate your writing skills and experience.
In order to make your writing profile stand out from other profiles (including other writers), you will want to focus on one main area - the Introduction section.
Of course there is more to a good writer's profile on Linkedin than just the Introduction section. The other sections do matter and I'll write more about them in another post. But if you get your introduction right, it will start attracting attention while still giving you time to work on the other sections.
The Introduction Section
The Introduction section includes the banner at the top of your profile and the text that fits in just beneath the banner.
This section is THE most important part of your LinkedIn profile. It should act like a scroll stopper, roadside billboard and old-fashioned business card all at the same time.
The Banner Area
The banner area of the Introduction section should contain a nice headshot of you looking professional, plus a banner image that sits behind your headshot.
Expert Tip: If you don't include a headshot, people will automatically think that you are extremely amateurish or worse, that your profile is a scam account. Always include a professional photo of yourself (not your dog/cat or you having fun at the pub).
If you do nothing with the banner area except add in your headshot, it will look like this ...

If you put on your marketing hat for a second you can instantly see that there is enormous opportunity to use that space to tell people EXACTLY what you do and how you can help them.
Here is an example of a writer who uses his banner space to simply and quickly tell people what type of writing he does.

Just adding those seven words on a plain, lightly coloured background makes his profile stand out about a thousand times more than the one I showed you above. But remember the old marketing adage ... "sell benefits, not features"?
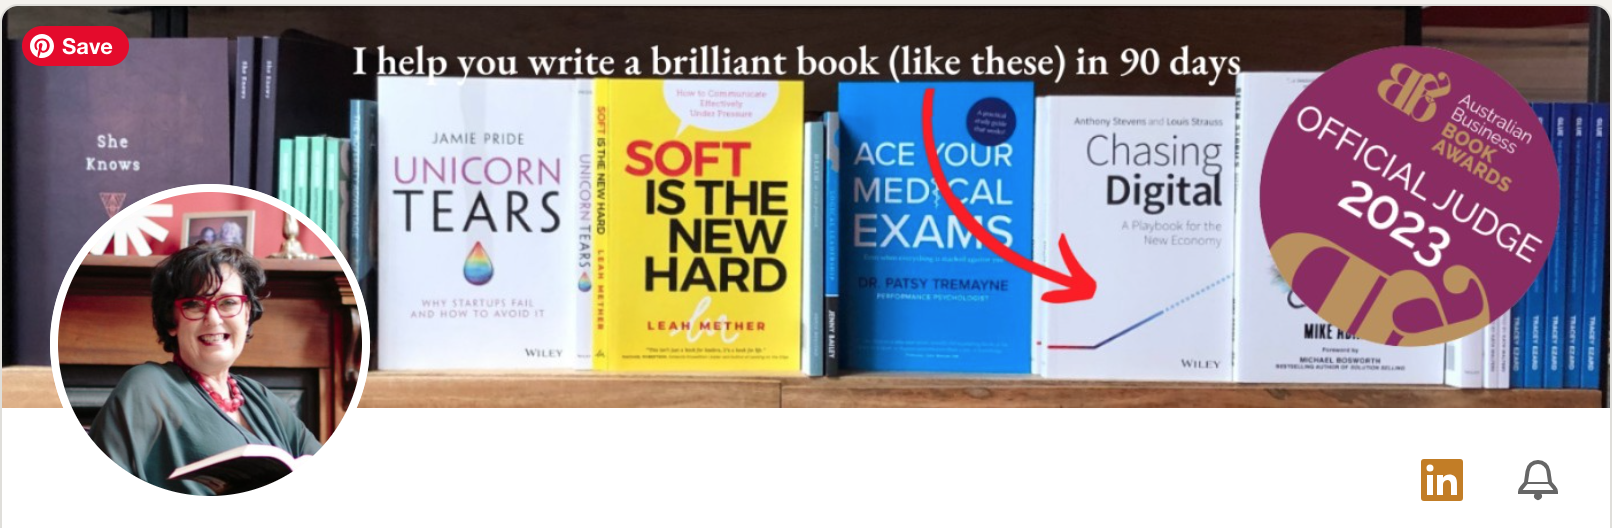
Here is an example of a writer who has maximised the banner space to tell people what benefits they will get from using this person's services. Plus there's the "official judge" stamp which adds an element of trust and authority to the banner.
You'll want to play around with different banner ideas and how they fit in with your headshot (which is always a circle) and even try those ideas out to see which ones are best at getting people's attention.
Canva (affiliate link) is a brilliant tool for creating these banners and makes it super easy to experiment with different styles, fonts and layout. Their free account has all the functionality you need and it's user-friendly.
The Text Area (Under The Banner Image)
The text area under the banner image is where you are going to add in important details. For example, you can include more information about the services you offer, hashtags about the topic areas you write about and your contact details.
In the example below, professional writer Lynnaire Johnston has niched down to a specific type of writing. She now helps her clients by writing their LinkedIn profiles for them. You can see at a glance from her LinkedIn banner exactly what she does.
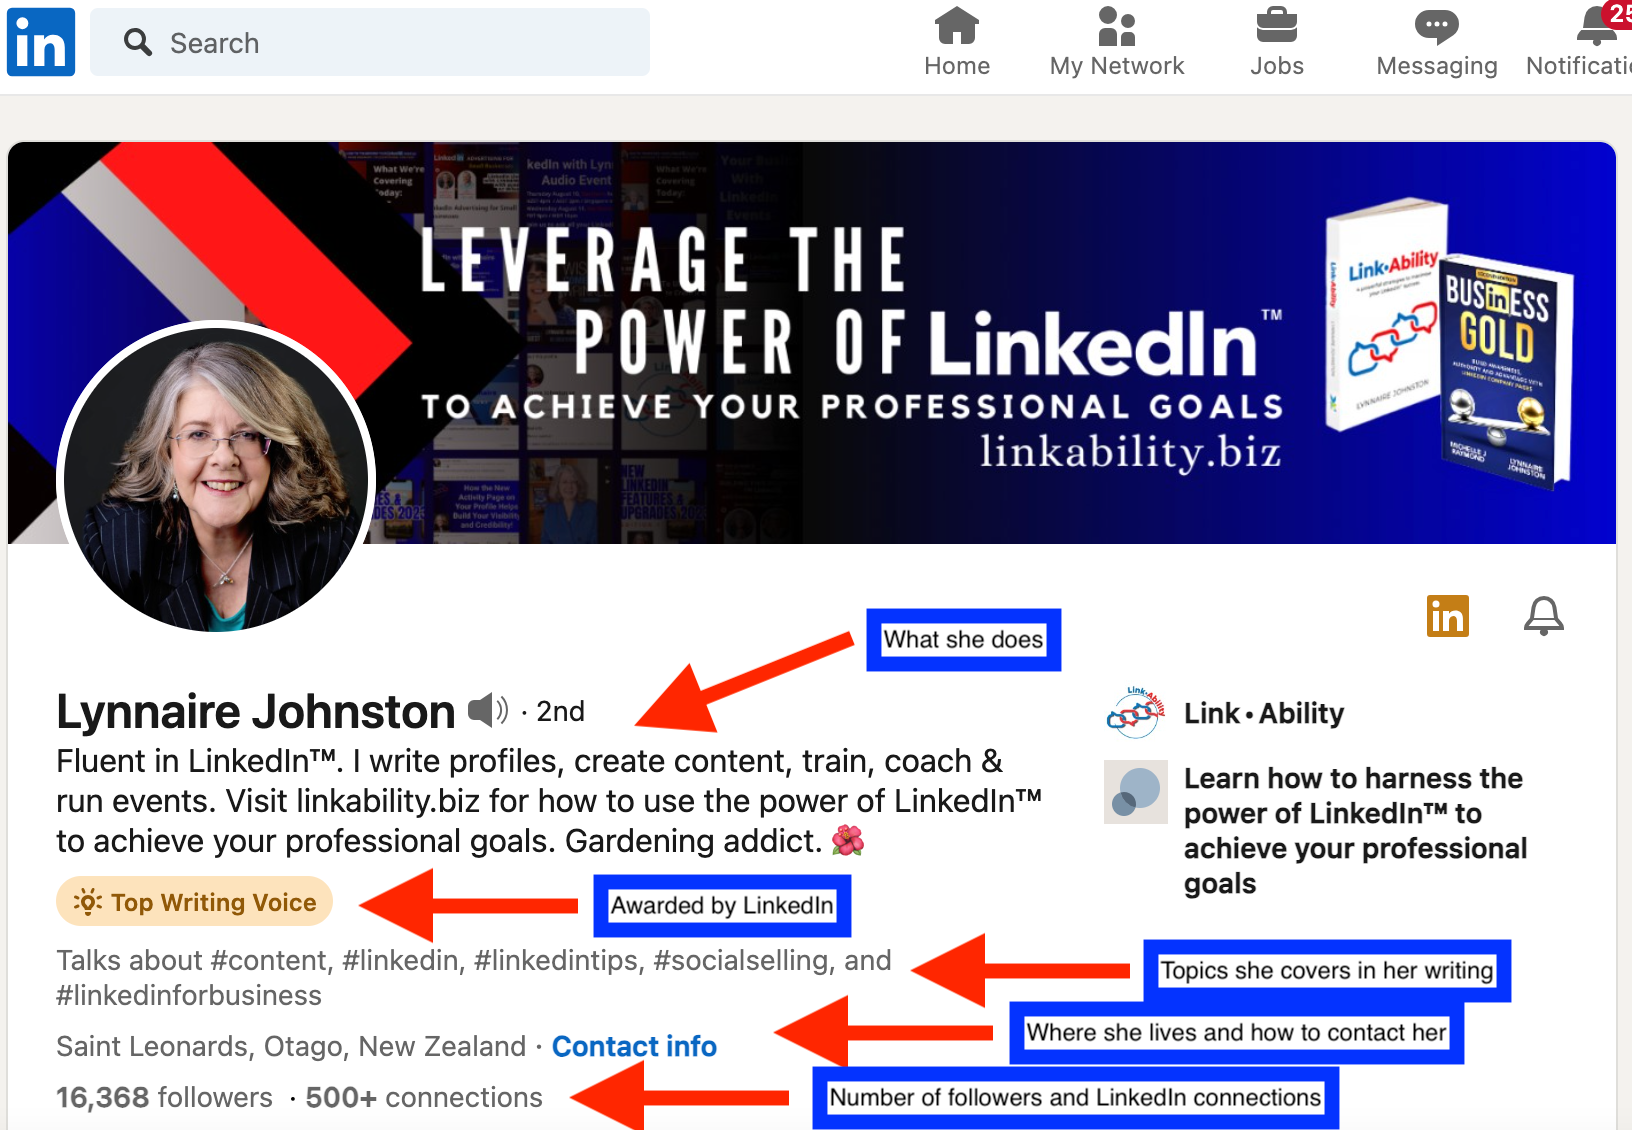
And note that in the "what she does" section, she has included a call to action (very important) and something personal (she loves gardening) which builds trust.
The "topics covered" section has a lot of hashtags. You'll want to think carefully about which hashtags you include and how many. As a rule of thumb four to five hashtags is about the right amount. Not too many (which is confusing and hard to read), but not too few either.
Remember, LinkedIn is as much a search engine as it is a tool for connecting people. You want to maximise its ability to help you find your clients and help them find you.
How To Edit Your Profile
Now that you've got an idea of what to add in to the Introduction section of your LinkedIn profile, it's time to do the work.
To get started editing your profile (if you've already set up your account) find the little pencil that's at the top right hand corner of each section.
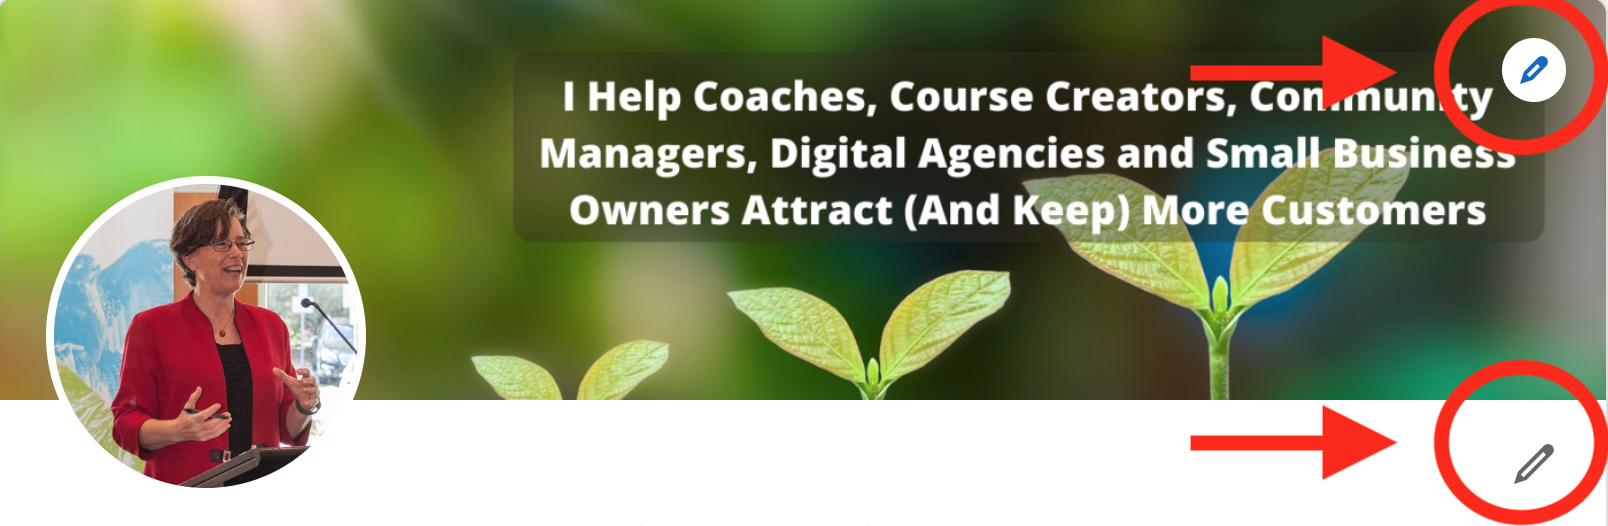
When you click on those little pencils they will open up the section and you can go in and make whatever changes you like. Remember that the changes will only apply to that section, which can make the whole process a bit fiddly if you need to do a lot of editing.
Make sure you save your edits within each section. If you accidentally close the section before saving, you'll have to go back and do it all over again.
Okay, now it's time to take what you've learned so far and take action.
Taking Action
- If you don't already have a LinkedIn account, get that set up asap.
- Clear some time out of your busy day to create your LinkedIn banner and the text below it. I've found that blocking out time in my calendar can make it easy(ier) to say no when other things demand your time and attention.
- Next, grab your favourite drink (I like chilli hot chocolate), paper and pen and brainstorm the words that you want to include ON your banner image and IN the text area. Think about:
- Which words (and which hashtags) will convey what type of freelance writing you do (and for whom) most effectively?
- What background will highlight those words the best? Simple and colourful? An image that illustrates your area of focus?
- What will your call to action be? What do you want people to do once they've found you on LinkedIn?
- How do you want people to contact you?
- Create multiple versions of your banner and try them out on your profile. Share them with people who get what you do and ask them for feedback. Or you can use a polling service like PickFu (affiliate link) to get quick feedback on which banner version is most effective. You can sign up for their free account which may be all you need.
- Celebrate this bold move forward and do something special for yourself. You deserve it.
Want To Know When The Next Post In This Series Comes Out?
If you haven't already subscribed to the Freelance Writers Online newsletter, do so now and you'll be notified when the next post in this series on how to set up your LinkedIn profile as a writer comes out.
Upcoming topics include:
- Which of the other LinkedIn profile sections to focus on and why (hint...you don't need to use all of them)
- How to use LinkedIn to quickly build your writing portfolio...a portfolio that will build trust and authority as well as attracting new potential clients
- Which specific combination of sections will highlight your work best
- How to use LinkedIn's built in tracking capabilities to know what is resonating with your audience and what isn't.
Please note that as an Amazon Associate, we earn from qualifying purchases. That means that if you click on one of our affiliate links (these are clearly identified) then we will receive a small commission, for which we thank you. It helps us keep on providing informative posts that help you build your freelance writing career and business.


Member discussion